- Details
- Written by: Webmaster
- Category: RCBot2 for DoD:S
- Hits: 7297


There is a download to assist this guide.
This download is made with four folders following the guide for a "vanilla" RCBot2 server with MetaMod and Sourcmod installed.
There are 2 other optional folders, folder "5_optional bot quota" loads bots using special plugins so you can controll their class.
Folder "6_complete set" is the base first four folders and the 2 optional folders. You will still need to add binds and a admin file needs editing.
Please... read the readme and the guide.
This guide is for learning how to assemble a server with RCBot2 not just a quick download and magic happens.
There is more to running a server than a quick install.
Section Index |
Sub Section links |
| 1. Introduction | PC selection, what to expect from this guide. |
| 2. SteamCMD install | The base install of a dedicated server |
| 3. Server set up | Set up and personalize the base server...server.cfg and how to make one. |
| 4. Server Admin Mods | Install the main server mods Note: IMPORTANT SET in this section people miss... Adding Admins |
| 5. Add RCBot2 | Special mention... if you want to load via rcbot2 "Bot Quota" system read this sub section also another special plugin to manually balance teams. |
| 6. Add SourceMod Plugins | Medic, Parachute, Jetpack, Extended Map configs, Gun Game, DoDs_Equipment |
| 7. Add Maps | |
| 8. Fine-tune your game server | |
| 9. Other plugins to consider |
You can approach playing Day of Defeat:Source (with RCBot2) a couple of ways, online via a dedicated server, on a Listenserver on your own PC, or as in this case a dedicated server on your home network.
Being an ex-clan leader and server admin I missed having admin menus and mods and let’s face it a listen server even on a 2015-2023 gaming-level PC with a lot of mods running and maximum bots running tends to get a little buggy if your hardware is lacking performance.
This guide is for someone who may want to have total control over the Day of Defeat:Source single-player mode (bots) and maybe even host a LAN party for not only dod (with bots) but also a Counter-Strike 1.6, Half-Life 1, or any other server that uses SteamCMD and the 2013 "SteamPipe" content system.
I used an old Dell OptiPlex 3050 - Micro, Core i5 7500T / 2.7 GHz, RAM 8 GB, SSD 256 GB , HD Graphics 630.
The test PC is running Windows 10 Pro 64bit.
Even an old laptop running Win 7 would do but there is a limit.
My second test PC was a very old spec PC (32 bit Windows - HP 10 laptop AMD A4-7210 8GB RAM) it was OK at 20 bots, 24 to 30 bots, play was choppy.
I had to reduce the RCBot2 bots from 30 to 20 on normal maps, big snow maps with mods I had to drop again to 16 and even 12 bots.
It's because most gamers will likely have something like this lying around that is too low-powered to run games but will run a simple game server on a local home network. I would advise you to use Ethernet for the connection.
This could also be a nice install for a new server admin, you can try out things on a quick and dirty home server first.
For persons who have never set up a dedicated server with admin mods and always wanted a step-by-step guide, then this one is for you.
The setup is the same for an online dedicated server only... you are not remotely connecting to the server.
Grab that old laptop or PC out of storage, fire it up, and let's go.
It is far easier for novices to complete this task as a C drive install.
In saying that, you can install it on a D or whatever drive, you will just need to adjust that but if the computer you use is just for a server, you will likely have enough space on the C drive.
There is a lot of information on this for online dedicated servers. We need to download and install the common base for HL1 and Source dedicated servers. It's the same for a local LAN PC the difference is we have physical access to the server OS and file system.
Go here for the full story That official guide can be a little confusing (daunting for most) as it has multiple OS instructions.
I will write it as if you have not used the console before. Don't let that console scare you... it's at an easy novice level.
We will be making one folder on the C:\ drive and a separate one (via the command line in a console) for Half-Life2 and Day of Defeat: Source.
Set up the main directory.
C:\Users\yourname>_
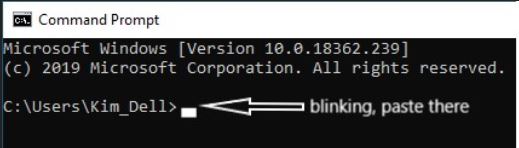 |
cd C:\steamcmd
.\steamcmd
 |
Before we continue - We are about to make a new folder called "c:\server\".
The warning is ONLY for persons who may have installed Half-Life 1 games in a "c:\server\" directory folder.
If you alredy have a folder "c:\server\" then where I say type "force_install_dir c:\server\" make your folder different!
Use the command "force_install_dir c:\server_hl2\" instead to make a different folder.
That way steamcmd doesn't overwrite HL2 files over HL1 server files.
So if you had to change that folder name, just remember later in the guide where C:\server is mentioned yours will be C:\server+hl2.
For those that haven't installed other server files to "c:\server\" directory folder, please continue.
force_install_dir c:\server\
login anonymous
 |
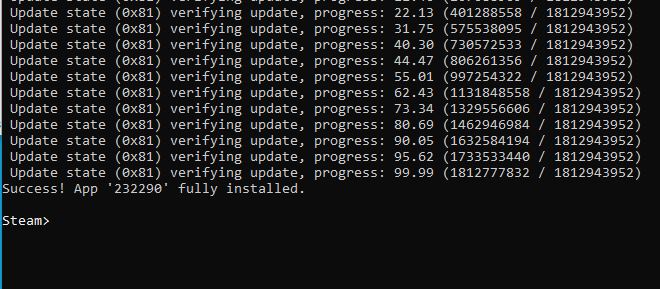
app_set_config 232290
app_update 232290 validate
Note: if you get an error like the yellow highlight in the image below (The error in the image is from an HL1 dod install not dods), just run the command "app_update 232290 validate"again…
The error for dod:s will be similar to the image below and the app number will be "232290" not "90"
 |
 |
quit
 |
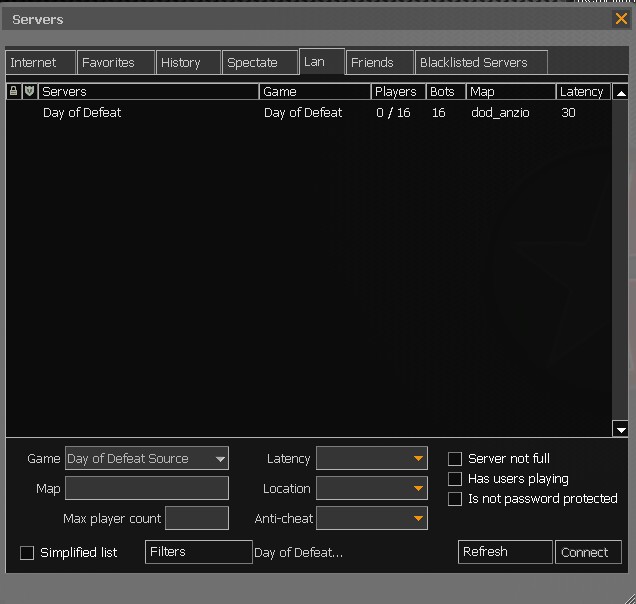
We have now got the base for a working dedicated server for Day of Defeat:Source.
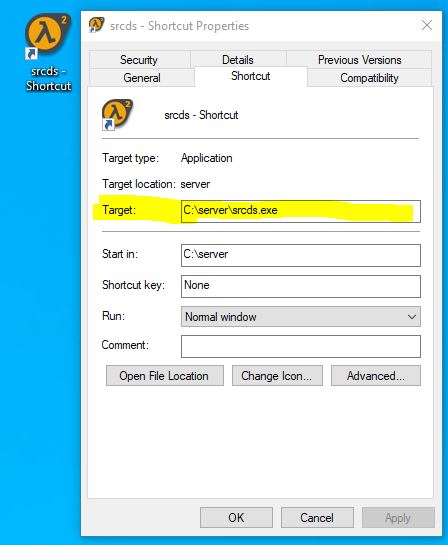
We want to test it next and seeing we are on a PC connected to a local LAN it's a simple task involving making and altering a desktop shortcut.
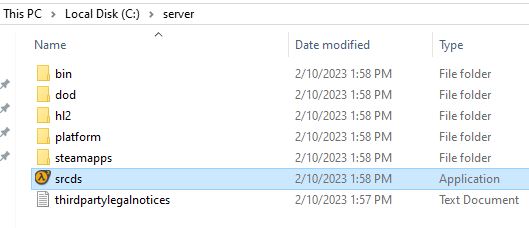 |
.
 |
Note for the "previous_build" beta version remove the -autoupdate command
-console -game dod -insecure +map dod_anzio -autoupdate +maxplayers 32
So all together it now looks like this...(for the current 19 Feb version)
C:\server\srcds.exe -console -game dod -insecure +map dod_anzio -autoupdate +maxplayers 32
For the previous build beta version drop the -autoupdate and looks like this...
C:\server\srcds.exe -console -game dod -insecure +map dod_anzio +maxplayers 32
I know what you are thinking, what the heck is all that?
They are command line options to start a server with...options with Console variables.
There is a lot you could put there but, explained it is....
-console - srcds will run in console mode (Windows only)
-game dod - Specifies which game/mod to run. In this case dod.
-insecure - Starts the server without Valve Anti-Cheat. That is VAC, we don't want VAC when running RCBot2 needs "-insecure".
+map dod_anzio - Specifies which map to start with on server start. You can put another in.
-autoupdate - Autoupdate the game.
+maxplayers 32 - Specifies how many player slots the server can contain. Other popular choices are 8, 12, 16, 20, 24. Up to you.
Makes sense now?
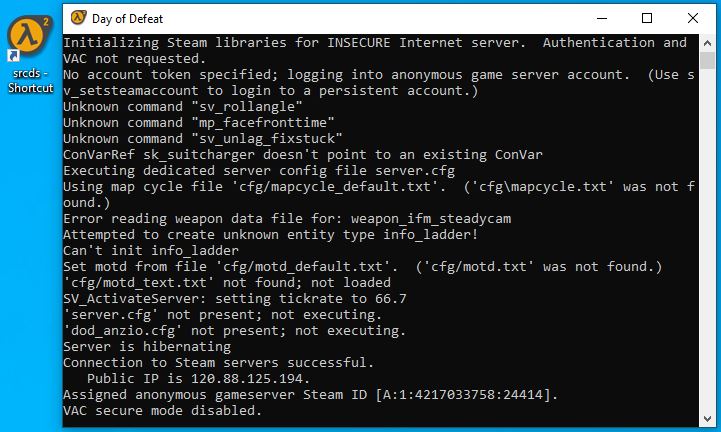
Time to test your work...
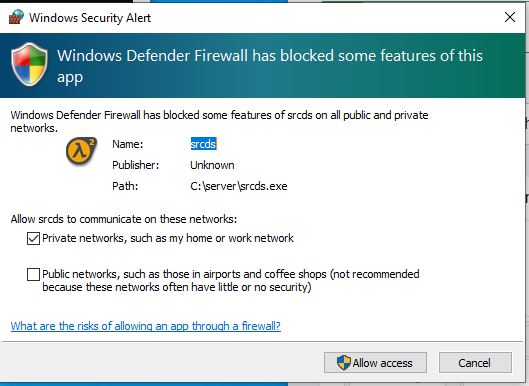
Note: the Windows firewall may come up again... you know what that looks like I hope...
 |
Continuing on for 64-bit users...
 |
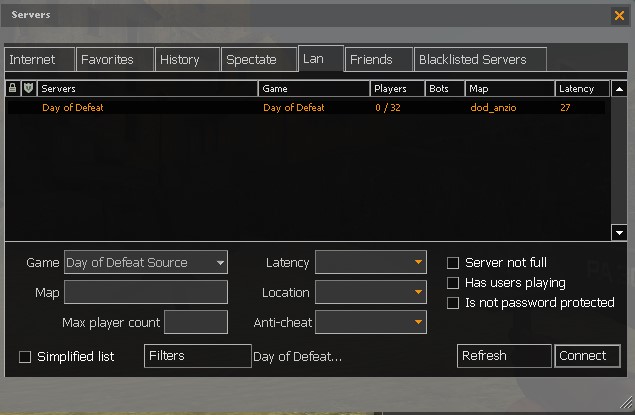 |
NOTE: No server in the Lan tab issue? A VPN related issue.
Back to those that don't have the above issue...
quit
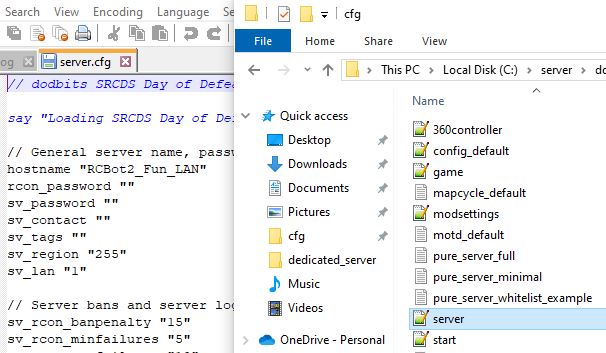
A file called "sever.cfg" is next.
To make the file go to this page. There is a lot there, but a lot of the settings already have a default or recommended setting already set. Just go down the list; you need to type in some items.
Here are the important ones, a lot are optional and you decide one by one...
There is quite a list below that and if using this for a local LAN then that's about all you need to do unless you are picky about your settings.
 |
 |
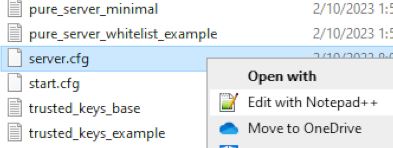
| Right-click menu Edit with NotePad++ | Associate with file types (click to enlarge) |
Or better still, associate NotePad++ with these special text files.
You now have a server.cfg file, you know where to edit it. The changes here are your server is more customized to what you want.
Before you go, consider adding this line to the server.cfg...
// Adding one RCBot2 bot to let other bots join
rcbotd addbot
It will allow the bits to start even if a human isn't on the server.
It's time we put in some admin Mods
Day of Defeat: Source uses MetaMod: Source, SourceMod is a MetaMod plugin. These two can be installed from their various installation and download pages.
To make this less of a task I have example files in a download.
You don't have to use those files in the download, they are there as a complete package as that is what the entire package was tested under.
Also, I will refer to the download folders a lot so it's the best way to read the below guide.
That download may or may not be important in the future.DoD:S is a very old game, most of its plugins were written in 2006-2013... 10 years ago.
Updates for this game... just don't occur.
That is both a curse and an advantage.
Updates often break server plugins, but then again some really old plugins still work because the game hasn't had updates so that's a good thing ?.
My bet is on DoD:S never getting an update again and the files above will likely last a long time
Even now there are many SourceMod plugins that don't work. You can find many that, even though made in 2008, still work, then again there are many that don't and some have been updated.
So the download I provide will not only supply the main mods but also plugins you know are going to work, in some cases I have arranged them so they are tested and each has a comprehensive readme on what it is, how to install, and use.
So this "all in one" download relieves you from searching around and finding the best version. It's up to you you have a working dedicated server and you can install the mods either way.
I will write as if you have the download and refer to the folders in it, links to the official download page will be supplied too.
MetaMod (official download and install option) is the first.
SourceMod (official download and install option) is next
Nothing needs to be done to the MetaMod files but quite a few edits are needed to the SouceMod files.
If we start the server now you will not have access to the admin menu, we need to add your Steam ID to a file so that when you are playing on another PC you can press a bind to access the menu.
Adding Admins (official guide) Beware, a lot of people get confused with that page.
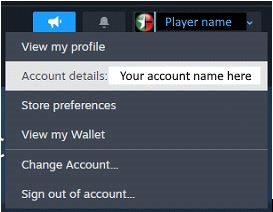 |
Under your name, you will see your Steam ID. e.g.: Steam ID: 745219****57379987
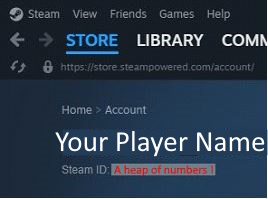 |
Go to one of the sites that find Steam ID's. Like STEAMID I/O
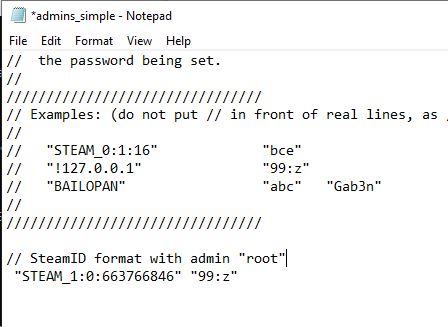
Adding that Steam ID to SourceMod...
"STEAM_1:0:663766846" "99:z"
Note: In this type of file if you see "//" in front of an item it comments out that line and is ignored. This way a description of the command below it can show its default and other settings.
 |
.
There are many ways to get a Steam ID and place it in to get SourceMod admins working, just remember the admins_simple.ini is limited to what Steam ID format is used. SteamID is OK and SteamID3 are OK, others are not.
Bind a key to access the menu...
To access the admin menu you need to bind a command to a keyboard bind, any key will do just make sure it's not in use.
I use the F11 key. bind "F11" "sm_admin"
bind "F11" "sm_admin"
When done, exit the game, return to the server PC, type in the console "quit" and press enter.
So far we have a dedicated server with the main mods and you have admin access and a menu.
Next is adding RCBot2. Then some SourceMod plugins.
I have this in the download but read this too...
You can download RCBot2 from a few places but the best place is APGRoboCop's GitHub. He is by far the most active, all others including the original author seem to have dropped off.
Now since DoD:S updated after the 19th Feb 2025... things broke. I have updated the files and also RCBot2 is no longer on that page above.
Use this for now as RCBot2 is now a version 2. I would watch that page in the future.
In the download, I have adjusted that official download for Day of Defeat:Source only, and altered...
The files I added to the official download are in "2_RCBot2" and the two subfolders "config and profiles set" and "Latest RCBot2 waypoints" for you to view.
To install RCBot2 from the download folders...
The RCBot2 config.ini is set to run 16 bots, run the server and test it now.
If you have not run RCBot2 before...
You may notice bots dropping near allied spawn...
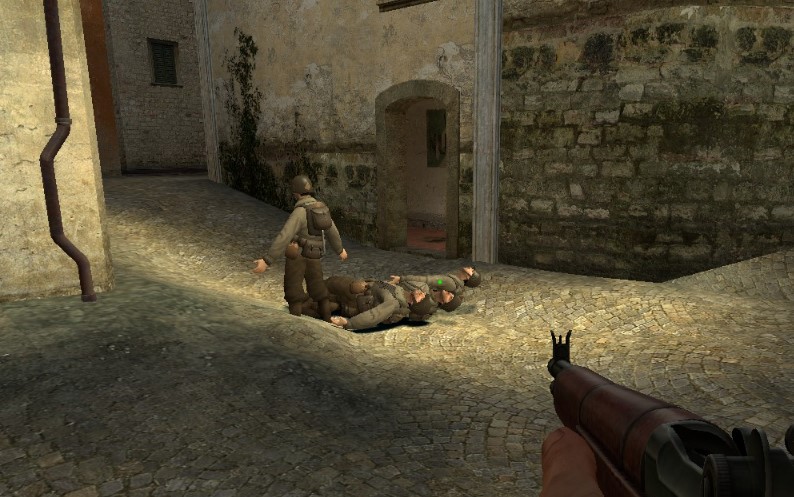 |
.
....that's "normal" for the newer versions of RCBot2.
Play a round, look at the scoreboard, and note there may be a team imbalance on your 16-player server.
Type "quit" and press enter in the server window when done.
You may have noticed that RCBot2 doesn't level the teams.
The imbalance you saw is caused by the files that load the bot type, in my set they are all set to a team and a class, RCBot2 picked randomly.
We will deal with that later looking at how to fine-tune the bot profiles,or the special plugin to manually balance teams.
for now let's look at bot amounts.
rcbotd config min_bots -1
rcbotd config max_bots 16
Adjust those two to what you want but be mindful to leave enough slots for you and your friends. For testing the server try 20, 24, or 30.
The issue of balancing team sizes with RCBot2
This can get complex and depending on your server configuration this has many solutions.
The advice right now is to place that issue aside for now.
Press on with installing SourceMod as there is a 2023 plugin solution, quickly read that in the last section and click the link to return here.
Choppy play issue.
Now you may notice some differences with a lot of bots loaded, you could, as the bots load to 20-30 notice choppy play.
Lower the bot amount but that may also point to your computer... like my second test PC a very old 32 bit windows laptop AMD A4-7210 8GB RAM.
The PC you selected may need some cleaning out and adjusting a few settings for speed.
See the special section on general PC hardware for more advice... the point of adding RCBots is where you may see obvious signs the PC you selected may be so under powered you may need to replace it.
For now, you could just stick to 16 bots and continue to install.
Speaking of loading bots - Humans and Bot quota. (optional loading of bots system)
RCBot2 does have another bot-loading system. If you are planning having Humans and bots on a server, better read this.
Note this involves a lot of downloads and configuration I have a download that "upgrades" you to this system and is configured for a 16 bot server.
This download is already in the main download in folder "5_Optional Bot Quota files" I have displayed it again if a server owner wants it seperatly.
Download here but read below if a 16 bot/player server needs adjusting.
Go back to the config.ini file.
There is a command above those two commands you adjusted, rcbot_bot_quota_interval.
It's a "Auto Bot Quota" method of loading bots and depending on how many humans there are the bots will join and leave depending on what you have set in config,ini, and another file called bot_quota.ini.
rcbot_bot_quota_interval it requires these to be disabled (-1) if you are adding bots this way....
rcbotd config min_bots 0
rcbotd config max_bots 16
If you load via the two above, make sure to disable the Auto Bot Quota system... rcbot_bot_quota_interval -1
Using the Auto Bot Quota method to have 15 bots on a 16 slot server and when the second human joins bots start to leave.
If you want to use the bot quota system and have a server of 16 maximum and... have bots leave when humans come on then you would have to edit....
rcbot_bot_quota_interval 5
rcbotd config min_bots -1
rcbotd config max_bots -1
Note rcbot_bot_quota_interval 5 "5" = 5 seconds between bots joining you can reduce that to 2 or 3 if your PC is good enough.
# Bot Quota Settings
# To use this settings you have to enable rcbot_bot_quota_interval
# Bear in mind, that the bots also count towards the max_players setting

Humans  "0" => Bots "15" # This is used for the default bot quota (empty server)
Humans  "1" => Bots "14" # 1 Human => 14 Bots => 16 Total Players
Humans  "2" => Bots "13" # 2 Humans => 13 Bots => 16 Total Players
Humans  "3" => Bots "12" # etc.
Humans  "4" => Bots "11"
Humans  "5" => Bots "10"
Humans  "6" => Bots "9"
Humans  "7" => Bots "8"
Humans  "8" => Bots "7"
Humans  "9" => Bots "6"
Humans "10" => Bots "5"
Humans "11" => Bots "4"
Humans "12" => Bots "3"
Humans "13" => Bots "2"
Humans "14" => Bots "1"
Humans "15" => Bots "0" # 15 humans on and bots start to leave
Humans "16" => Bots "0" # 16 humans and no bots (full server)
Humans "17" => Bots "0" # ect edit as you wish and depends on server size
Humans "18" => Bots "0"
Humans "19" => Bots "0"
Humans "20" => Bots "0"
Humans "21" => Bots "0"
Humans "22" => Bots "0"
Humans "23" => Bots "0"
Humans "24" => Bots "0"
Humans "25" => Bots "0"
Humans "26" => Bots "0"
Humans "27" => Bots "0"
Humans "28" => Bots "0"
Humans "29" => Bots "0"
Humans "30" => Bots "0"
Humans "31" => Bots "0"
Humans "32" => Bots "0"
As you can see, if all human players leave the bots fill the server with one slot spare, humans arrive and bots leave.
They are two separate systems and don't play nice together. Read about loading bots methods here.
So read those instructions in config.ini and bot_quota.ini and choose one or the other loading methods.
The issues we now have with this change are...
The "Server is hibernating" issue.
Problem:
You want the bots to stay on the server after you leave but they...don't.
That is normal in all the RCBot2 loading systems.
If you poke around the internet you will find dod:s does not have server hibernation in the official documents.
That's not true for RCBot2 bots or other bots in CS:S and dod:s.
If you leave your server...bots will leave too.
You should note no matter what, on the first server start a human needs to join to start the bots...the following solution is after that initial start.
However, in day of defeat:source with RCBot2 version 1.7 beta2 if you place "rcbotd addbot" in the server.cfg bots WILL start without a human on server start up.
Other mods may differ.
Solution:
Delay or disable server hibernate by Bacardi was made for this issue. Follow the instructions and install the plugin.
Note that it also says requires a extension Dhooks2 in particular this one. It's not required these days.
You have to make Delay or disable server hibernate start.
You will have to add this to dod\cfg\sourcemod\sourcemod.cfg ...
// Delay or disable server hibernate plugin
// This disables hibernate mode
sm_hibernate_when_empty -1

// Server goes in hibernate mode in 60 seconds, Default value.
// Value 0 and any another negative value than -1, plugin doesn't do anything.
sm_hibernate_when_empty 60
The next thing to do is add a RCBot2 command to the server.cfg file so when the server starts...bots will too.
This could be handy for online use, or testing a server load, on a local LAN it's not much use but it is part of the "RCBot2 DoD:S dedicated server options you may wnat to learn.
Go to "C:\server\dod\cfg\" and open "server.cfg" in the //General server settings area at the top and add this...
// Adding one RCBot2 bot to let other bots join
rcbotd addbot
That command will work if the RCBot2 version is Version - RCBot2 v1.7-beta2 or above and the reson why the files were updated in Feb 2026.
In version RCBot2 1.51 there was a need to add a plugin so the bots would fill the server, this is no longer required.
The uneven teams issue.
Problem:
If you change teams your teams are out of balance.
Solution:
There is a further plugin you can add to swap players from team to team.
[ANY MOD] SwapTeam v1.2.6 (Updated 30/09/12) by bobbobagan
Run the server and test.
You will now see this when you exit, no humans and 16 bots.
 |
| The bots now stay when you leave - no hibernation |
The Bot Class issues.
If you want to strictly control the bot class, limiting snipers, MG and rocket classes, take care and do not use the valve commands for limiting a class, you will have many errors and crash the server.
They are in C:\server\dod\cfg\server.cfg look for the // Allies Class Restrictions and // Allies Class Restrictions sections, and leave those twelve commands at the default "-1" always when running RCbot2.
You can edit the bot profiles to select a team and a class, then in C:\server\dod\addons\rcbot2\config\config.ini set...
rcbot_change_classes 0.
This is how I have altered the files in the download. The bots are set to a team and class using the information here.
The command rcbot_change_classes is set to... 0.
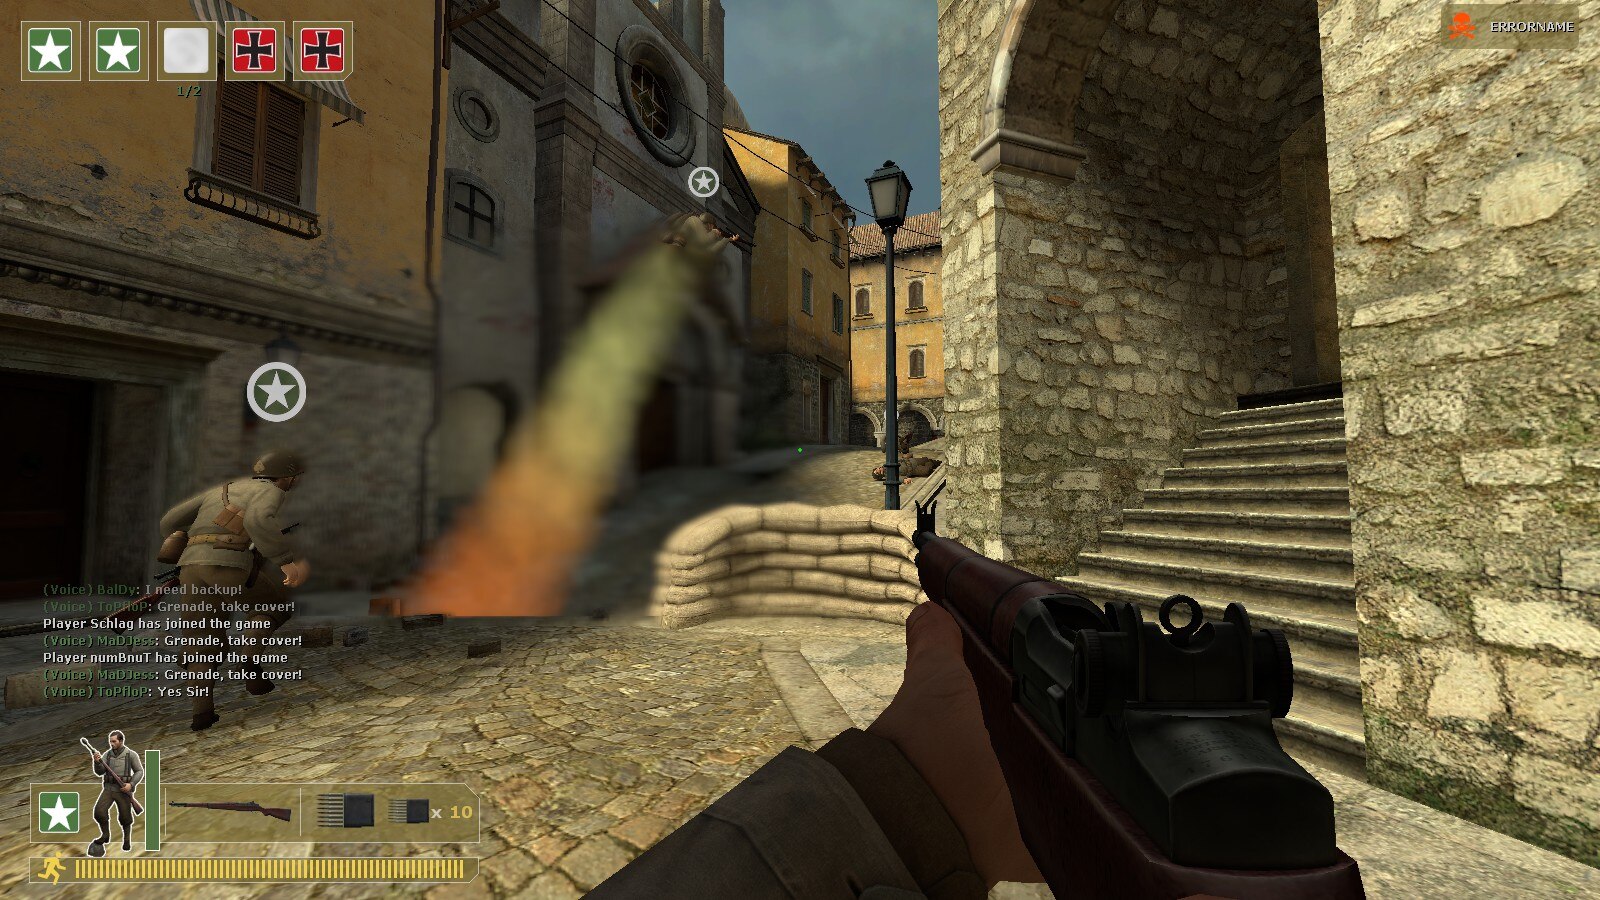
If you set the server to a maximum of 31 bots (one slot left for you) you will see this set of classes, tightly controlled and not the 3 X snipers, 3X mg and 3X rockets per side you see in the official files... (click on the image to enlarge)
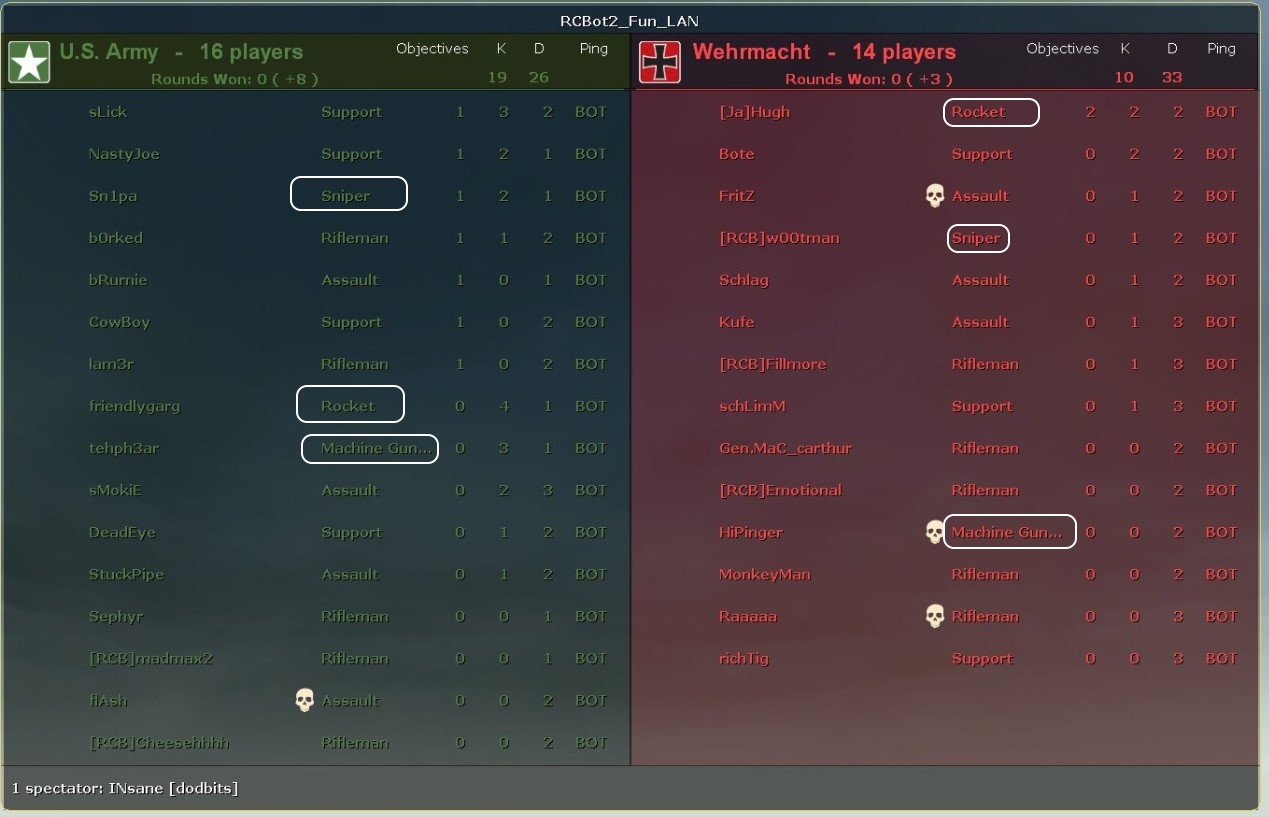 |
| 1 X Sniper 1 X MG 1X Rocket - Per side. |
.
As you can see, understanding what the commands do in the server.cfg, editing the bot profiles, and config.ini opens up a whole new world of possibilities.
I recommend you read those pages if you are experiencing an issue controlling the bots on your server.
There are other ways to control the number of bots and the class for every map. It's too complex to place here but an article will be coming soon on that, and it involves a SourceMod plugin.
Speaking of SourceMod plugins, it's about time we added a few.
The Custom Admin Menu for SourceMod and sourcemod.cfg
Admin Menu files.
If you have not manually edited the admin menu before, you can read about making a Custom Admin Menu for SourceMod here.
Note that those edits are not just one file, the menu requires edits to at least three files out of the four.
All are in dod\addons\sourcemod\configs.
The sourcemod.cfg file
As you add plugins, some may require edits to dod\cfg\sourcemod\sourcemod.cfg depending on your personal preferences. I have added the entries you need for the plugins below.
Install the special edited files above...
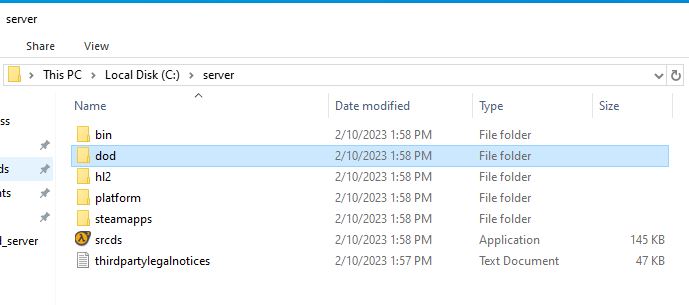
Make sure you get the right folder we will be doing this a lot...
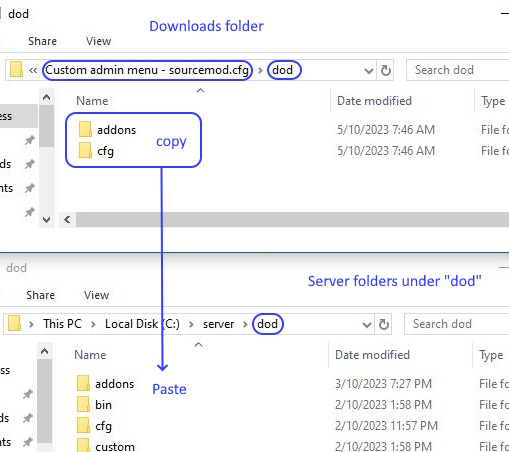 |
|
Copy and paste from the download "dod" folder to the server "dod" folders. Click the image to enlarge |
The plugins below - general information.
Medic.
We should start off with an easy one.
In the folder "3_SourceMod plugins" open "Medic addon". Then open the "dod" folder, copy the two folders, and paste them into C:\server\dod.
Parachute.
This is the classic "Jump off a high place, press "E" and you float down and land softly".
In the folder "3_SourceMod plugins" open "Parachute addon" then open the "dod" folder, copy the three folders, and paste them into C:\server\dod.
Jetpack.
A classic Jetpack. No frills nice and simple.
You might be tempted to install one of the more updated ones. Read the readme why I selected this one for a RCBot2 server. Other than issues in the files and DoD:S compatibility, some other plugins use the space key, the default for "jump".
The bots use that key often and while funny, it ends in them flying into space, crashing down, and gradually dying. It gets old really quickly.
 |
|
Rcbot2 with a Jetpack Version 1.4.1. Click the image to enlarge. |
.
A key bind is required in the download version.
Something like bind "MOUSE4" "+jetpack" may suit you.
The version in the image above is not the same as the one in the download.
Just a note it could be a fun mode on some maps.
You would need to use another plugin that turns plugins on and off (and load and unload plugins) as maps change.
The next plugin is a must-have for controlling plugins during a map load. It will save you a lot of time and open up your options for a fun server considerably.
Extended Map configs plugin
The way this works is on every map load the server looks at server.cfg, applies those commands. Next is sourcemod.cfg, which applies those commands.
The ValVe system then looks for a <mapname>.cfg file, applies those settings.
That is when this plugin takes over. To quote the author in his "Usage (directory structure):" section, files are referenced in this order...
This directory holds a config file for every map you have. They should have been automatically created for every installed map.
This is very similar to valve's build-in mapconfig system. The file de_dust.cfg will be executed for the map called de_dust.
You can safely create additional config files for new maps and/or game types, the plugin will automatically try to load the appropriate ones after every mapchange.
In the download, you will see some examples that control GunGame, if you intend to install Gun Game for DoD:S (coming up next and recomended) go to...
For now, just install the plugin...
Don't test it yet, it will not do much yet until we install the 2 mods below.
In the next section Gun Game, we will explore how it is used on the server.
The Extended Map configs plugin is very useful and we will be coming back to that plugin again. I regard it as a core "must-have" for a fun server.
Gun Game.
Everyone loves a quick change to the normal dod maps and this mod adds a gameplay that is also perfect for learning all the weapons.
Custom Maps issue - the mapcycle file needs a quick edit.
The process when adding a new map.
dod_argentan
dod_avalanche
dod_flash
dod_donner
dod_anzio
dod_kalt
dod_jagd
dod_colmar
dod_palermo
dod_gg_ancient_b1
dod_gg_bull_b1
dod_gg_s4e_map1
dod_gg_s4e_map3
dod_gg_sprengen_s4e
gg_il_pocured_2011
gg_the_middle
gg_the_round
Test the Gun Game and Extended Map configs plugin together.
You can use this on normal maps but on them, the bots still go after flags and on some parts of dod_anzio like the centre flag axis group up there and don't move.
DoDs_Equipment_0.0.8
This is the last plugin on the list in this pack. It may be a little complex for some.
Like Gun Game it can be related to the Extended Map configs plugin to automate changes on every map change.
Basically, this is a plugin that uses (complex to edit at times) config files to strip off weapons in the DoD:s classes and replace them.
It is (officially) DoDs_Equipment_0.0.7 as explained in the readme, I have done some quick edits to the .sp file and complied it under a 2023 version of SourceMod.
The files we just installed are the base plugin, then some config files to control weapons, and then some maps.
The plugin needs config files to change weapons, these are on your server in C:\server\dod\cfg\sourcemod.
dod_equip_all_camp.cfg
This file will alter all weapons in all classes. Look at the file. Note the command at the very top sm_equip_enabled "1", just in case other plugins have set this to off ("0") when we execute the config it will turn the main plugin on.
Moving down the file, each class has two sections, like the Sniper class, one for Allies and Axis.
There are three basic commands in each class that firstly strip weapons, then add weapons, and add ammo.
Each class/team has three commands each making a total of 36 commands just to configure weapons.
Let's look at just one in detail The US Sniper at the top of the file under "//SNIPER class".
It is complex to set up but once you make a file, edits become easy, if you want the US sniper to have 10 frag grenades just change the ammo values to "75 100 10".
I hope the example files remove some of the complexity. One more item when editing I found useful was to have the bottom guide with weapon names in another file besides the one I am editing.
The other three files change weapons too...
dod_equip_low_ammo_camp.cfg
All this does is alter the Sniper, MG or Rocket and make them use secondary more by lowering the main gun ammo. May be handy if your server population is way too keen on the camp weapons. Snipers only get 15 bullets, they get 5 secondary gun clips. not the normal 3 clips. The other camp classes get the same treatment, it is a sort of penalty for selecting a camp class. Lower ammo.
dod_equip_no_camp.cfg
All this does is replace the Sniper, MG or Rocket with assault, support and rifleman. It's another that can be called on something like a small Orange map and change gameplay. That is important for RCBot2 if you have the normal classes of 3 X sniper, MG and Rocket per side.
dod_equip_old_dod.cfg
Everyone has a pistol. Everyone has a knife. Rifle grenades were swapped to frag types. No smoke grenades for Assault.
The old dod load out, see that here https://dayofdefeat.fandom.com/wiki/Day_of_Defeat#Classes_and_Weapons
I made this one the server default. I did this in your files using the Extended Map configs plugin.
If you go to C:\server\dod\cfg\mapconfig\general and open the "all.cfg" file you will see a line...
sm_execcfg "/sourcemod/dod_equip_old_dod.cfg"
On every map load that will be executed, it's the default weapon load out for your server.
However, if the map "dod_snowbridge_explode_8" loads, another file will replace that, go to C:\server\dod\cfg\mapconfig\maps, open the file "dod_snowbridge_explode_8.cfg" note the command...
sm_execcfg "/sourcemod/dod_equip_all_camp.cfg"
...that one will execute after the default weapon loadouts as the file "dod_snowbridge_explode_8.cfg" loads after "all.cfg".
You can execute these in the middle of a map too. Open the Admin menu, look in ServerCommands, then...
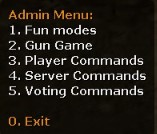 |
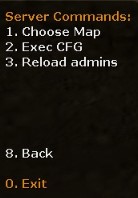 |
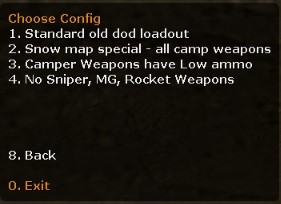 |
| Select Server Commands | Select Exec CFG | Select the config file you want |
.
You will note a confirmation in chat the file was loaded...
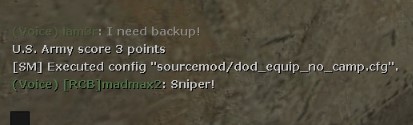 |
| Confirmation in chat |
.
In that case, I selected the file that removes all snipers, mg and rocket weapons and replaces them with Rifleman, Assault and Support.
On the next death of all players, the weapons change to what's in the file. It's not immediate when done this way, the change is on respawn.
There is a lot we can do with this plugin.
Using this plugin, the Extended Map configs plugin, Jetpack and Parachute we are going to go on a large snow fun map, loaded with snipers, mg and rocket class only, with 30 RCBot2 bots, load up with a massive amount of ammo, fly up and see how good you are with a long-range bazooka.
These big (badly made in most cases) snow maps can really test your server. My second test rig (very low-powered) was choppy using 20 bots.
16 and 12 bots were better, so lower that general bot setting in dod\addons\rcbot2\configs config.ini to...
rcbotd config min_bots -1
rcbotd config max_bots 16
...or 12 until the choppy play stops.
There is a way to reduce bots per map... but it's very complicated and I haven't finished testing it just yet.
It involves another plugin that delays config files, and many other config files to control bot classes and player amounts on the server.
The problem is RCBot2 config.ini loads last. The map config files cannot control RCBot2 commands... unless you delay them and load them after RCBot2 config.ini has finished.
A separate download may be coming for that in the dodbits RCBot2 section. It may help some online servers too.
These maps are a good test of server strength.
The other test PC a decent but old i5-based system with an SSD and 8GB RAM had no issues on any test map.
My low powered test PC with its low powered CPU and 32bit OS struggled but still managed 12-16 bots OK in all the tests.
Bots do put a strain on a server, bot amounts and their profile settings should be carefully reviewed on low-powered 32-bit PC's.
Like Gun Game, this is a fun mode and all you have to do is change the map to dod_snowbridge_explode_8, the plugins will do the rest.
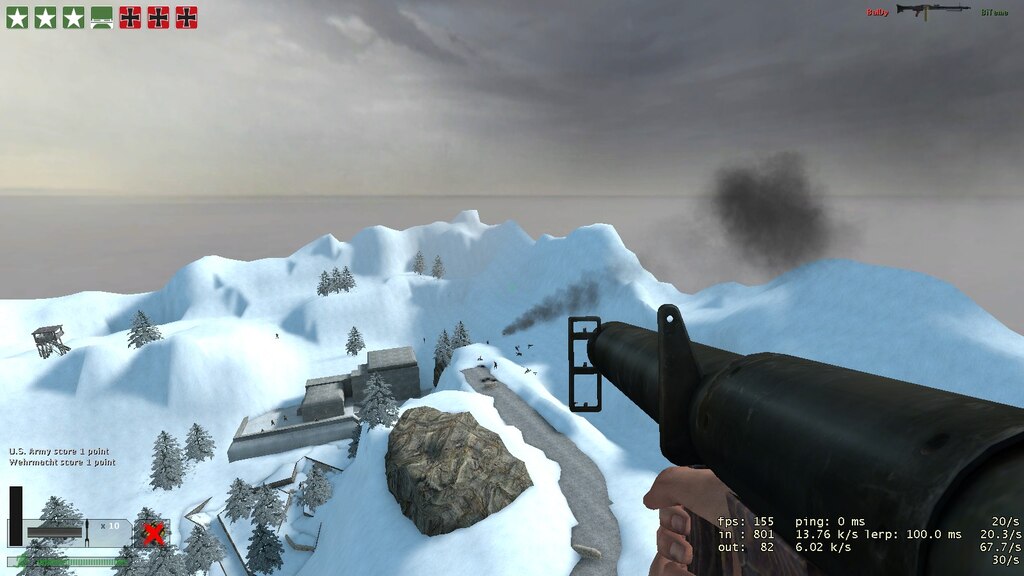 |
| dod_snowbridge_explode_8 - Click on the image to enlarge |
Sure it's a bit of a task for back-end edits to do but you only do that once, if no admins are on the server it will load like that every time.
Running a server isn't that hard after you have jumped through a few learning curves, I hope that helped someone out.
DoD:S isn't a dead mod just yet. But on a LAN, with a few selected friends, this could be a fun night... grab that laptop, and build your server.
Now that DoD:S is installed and you have most of the files for a server... go add the old dod too and other bots on sturmbot.org.
In that guide, you just need to start at "app_set_config 90 mod dod"
Seeing we have installed RCBot2, you will want to know where to get maps to match the waypoints we installed.
See this page on dodbits.com... Known RCBot2 waypoints and Map Downloads
There are bulk and single map downloads to match the waypoints for RCBot2 DoD:S maps.
In this section, we will explore hardware.
If you came here from the "Choppy play issue" subsection here is a link back to it.
There are two points in this guide where things don't run well.
There is a limit to what hardware you can use, this guide was written and tested on this hardware...
On my very old spec PC (32 bit Windows - HP 10 laptop AMD A4-7210 8GB RAM) it was OK at 20 bots, 24 to 30 play was choppy.
The ethernet seemed to be the bottleneck on that PC. Reducing the bots to 12 on (resource-hog badly made maps) was the option there.
If that is unacceptable, your PC may need optimization (reinstall the OS and turn off a few things) an upgrade, or replacement.
The other test PC was fine as it was, no settings change, just updated Windows 10 and drivers. 30 bots and me, no problem. (Dell OptiPlex 3050 - Micro, Core i5 7500T / 2.7 GHz, RAM 8 GB, SSD 256 GB , HD Graphics 630)
You could see the server crash after playing 30 minutes, that's likely the Power and sleep settings on the PC, the server PC went into sleep mode, and the server stopped.
It's ok to let the display turn off but you really should visit your settings and place the "Sleep" setting on "Never" at the very least.
Look at the various tutorials around the net for general PC settings for gaming... there are a lot of things the PC will not need on a local LAN just to run a simple game server... turn them off.
If you have done all you can to improve the PC performance and you still get choppy play... your hardware is too old.
Your options now are either add more RAM, a SSD or... adjust RCBot2 amount of bots down to 10-16.
Past that... consider another PC. Cheap PC's or even laptops second-hand are often purchased (depending on where you are in the world) and are very low.
Just be sure to get something like an old i5 CPU build around 2016, 8 GB ram and a SSD.
As a basic rule try for something five to eight years old.
It's easy if you get the right advice.
The old PC method, you don't have to be a linux superstar to set up...
You may consider a new Mini PC and connect some external enclosers to make a personal NAS (Network Attached Storage).
Keep an eye on some ideas in the future, a home server does not have to be used hardware, or noisy fans and take up a lot of space.
Look at this option.... 12 X SSD M.2 slots... one fan and tiny.
With M.2 prices falling in 2023, you could start with just a couple of drives now and just add the other 10 slots... as prices fall.
The other method is dedicated NAS hardware, like the old PC method you end up buying more ram, CPU's and the drives.
I think hardware like the below video are more like just using an old PC and a waste of time for what you spend.
This looks like a waste of time compared to the above for future-proofing...
It depends on your budget but these guides on home servers in 2023 show you no longer have to be a hardware and software engineer or spend $3k on a setup.
Just remember the storage drives are the most expensive part of this. They will have to be replaced one day.
Build a system based on the price of your storage and the maintenance and features of...
I run a UNRAID home server, built-in 2017 and is still only half full.
But I used old hardware from 2013 and bought new NAS drives.
Since then I have had to replace the motherboard and the power supply, both got too old and failed.
I also had a 4TB WD drive that was a major disk, a Parity drive, and failed within 2 years... 100% lost all data.
It was covered by warranty and the way UNRAID works is the Partity drive was rebuilt automatically... I lost no data on the home server.
As you can see, pick a system so that when hardware fails (and it will) the system can cope with it.
Also, your home server, even though robust will lose important data... what if your house burns down?
The most important documents (including photos and home movie files not just documents) will still need cloud storage to be 100% robust, so consider what you can afford to lose and what should be in two locations.
There are many plugins you may want to consider adding that I have not covered.
In the download, I have assembled plugins. That isn't the normal way to add plugins.
In this section I will provide links to downloads, now you have to get used to adding a plugin from scratch.
I will not - help you where to place items or configure plugins in this section.
I will - just list optional plugins and a brief description of what they do.
Link back to the balancing team's issue in the guide.
This plugin is from 2007. It states this in the original post...
"Plugin Description: This team balancer for Day of Defeat:Source keeps the teams the same size by moving dead players from the larger team."
There are updates on page 4 since then, two in 2023, one in post 38 by "playboycyberclub (link to posts)" and another by "micmacx (link to posts)" in post 39.
I recommend you keep an eye on both of those persons for updated plugins, and bookmark the post history links as they are both updating a lot of plugins for DoD:S in 2022 - 2023.
Use (download) the version micmacx made in Post 39 as his version mentions this...
"Hi, Another version that handles humans and bots separately.
First it balance human, secondly it balance bots.
And third if there are 3 humans in team 1, 2 humans in team 2 and the total number of bots and humans is 9 players, will balance by putting 1 bot in team1 and 3 bots in team2.
Which makes Team1=3+1=4 VS Team2=2+3=5.And there is a translation file for english and french.
The first zip is compiled with sourcemod 1.11 6502 and contain all files.
The last zip is for french translation."
.
Adding more soon (Oct -Dec 2023)
I do have a automated solution to get around the issue of controlling the bot class issue where you cannot control how many MG, rocket, sniper classes... per map and it works on a slow release just like the RCBot2 interval command to load bots slowly and not crash a server.
There are online server operators that will use and abuse that solution. I cannot release that at this time.
It is better to wait for the RCBot2 team to work through that in 2024.
Good lord that was a horrid experience writing that.
What takes about an hour for me to do... took days to put down.
Hope it helps.
INsane
Webmaster dodbits.com